Home Theater Design: Room Layout, Lighting and Acoustics
1. Define How the Home Theater Will Be Used
Begin by deciding what the room needs to support. A cinema used mainly for films may have different priorities from a room used for gaming, sports, television, music, and family gatherings.
Consider:
- How many people will use the room regularly
- Whether the space will be dedicated or multipurpose
- Whether movies, gaming, sports, or music are the priority
- Whether complete light control is possible
- How much equipment must remain visible
- Whether children or guests need simple controls
- Whether future expansion is likely
A dedicated room can use permanent seating, darker finishes, acoustic treatment, and a fixed projector screen. A multipurpose room may need a television, flexible furniture, brighter finishes, and equipment that disappears when it is not being used.
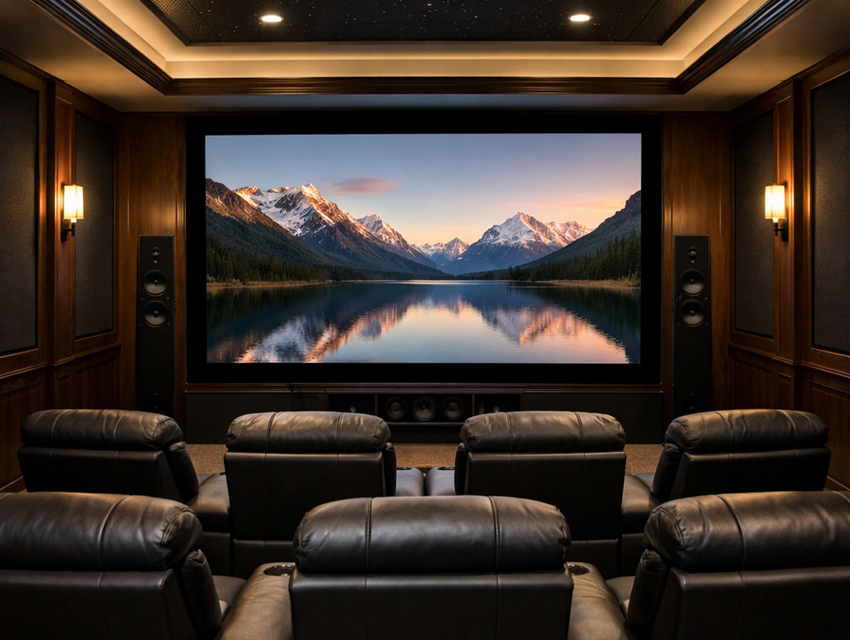
2. Choose the Right Room
Almost any room can support a home theater, but some spaces are easier to adapt than others.
Room dimensions and shape
A rectangular room usually provides a clear axis for the screen and seating. A square or irregular room can still work, but it may require more careful placement and acoustic planning.
Room proportions influence low-frequency behavior, but shape alone does not guarantee good or bad sound. Speaker position, subwoofer placement, seating, construction, and acoustic treatment also matter.
Windows and daylight
Rooms with fewer windows are easier to darken for projector use. Windows can also create screen reflections and provide surfaces that reflect sound.
Where windows are present, consider:
- Blackout curtains or blinds
- Side channels that reduce light leaking around blinds
- Curtain materials that help manage reflections
- Screen placement that avoids direct sunlight
- Ventilation requirements when windows are covered
Doors and access
Door location can limit screen width, speaker placement, and seating capacity. Check the opening direction and ensure that viewers can enter and leave without passing directly in front of the screen.
A door close to a rear or side wall may also affect the placement of surround speakers or acoustic panels.
Noise and nearby rooms
Consider both sound entering the theater and sound escaping from it. A room next to a bedroom, shared wall, or quiet workspace may require more attention to sound isolation.
Basements can be convenient, but they may present challenges involving ceiling height, moisture, ventilation, and access. Spare bedrooms and living rooms can also work well when their limitations are included in the design.
3. Create a Home Theater Layout
The home theater layout should be planned before selecting furniture or permanently installing equipment.
Mark the positions of:
- The screen or television
- The main seating location
- Additional seating rows
- Front, center, surround, and height speakers
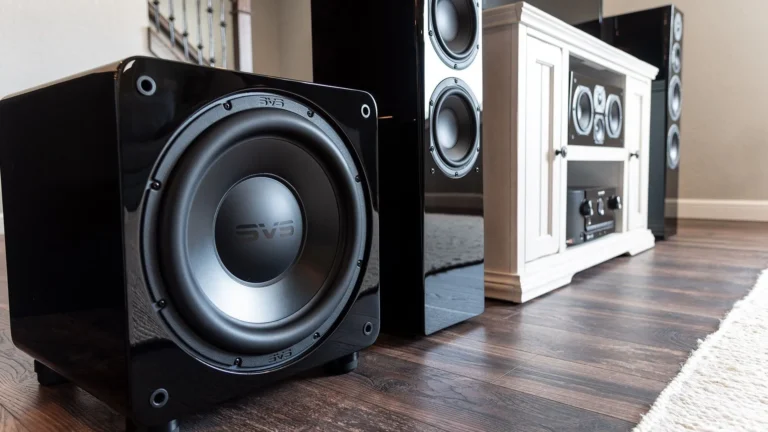
- One or more subwoofers
- The projector, if used
- The equipment rack or cabinet
- Doors and walkways
- Electrical outlets and network connections
- Lighting fixtures and controls
- Heating, cooling, and ventilation openings
Draw a scaled floor plan rather than relying on memory. A simple plan can reveal conflicts between recliners, speakers, doors, projector placement, and circulation before installation begins.
Choose the main viewing position
Most picture and sound decisions should be organized around a primary viewing area. This does not mean that only one chair receives a usable experience, but it provides a consistent reference for screen and speaker placement.
Avoid placing the main seat directly against the rear wall when the room allows another position. That location can complicate surround placement and produce uneven bass.
Preserve clear walkways
Viewers should be able to enter, leave, and reach every seat without climbing over furniture or passing dangerously close to equipment.
Walkways should remain usable when recliners are fully extended. Steps and level changes need to remain visible in low light.
4. Position the TV or Projector
The display should be positioned around comfortable viewing rather than centered on the wall for decorative reasons alone.
Television
A television is often the most practical display for a living room or another space where daylight cannot be fully controlled.
Design considerations include:
- Screen reflections from windows and lamps
- Wall strength and mounting method
- Comfortable screen height
- Space for a center speaker or soundbar
- Cable routes and accessible connections
- Ventilation around the display
Avoid mounting the television too high simply to align it with artwork, a fireplace, or tall cabinetry. The main viewers should be able to watch without maintaining an uncomfortable upward head angle.
Projector
A projector can provide a much larger image, but its location must be coordinated with the screen, seating, ceiling, lighting, ventilation, and cable routes.
Plan for:
- Throw distance
- Lens position
- Projector mounting point
- Screen dimensions
- Image offset and lens-shift range
- Power and signal cables
- Cooling airflow
- Fan noise
- Access for maintenance
Do not place a projector inside an enclosed decorative box unless the enclosure has been designed around the manufacturer’s ventilation requirements. If you are considering a JVC projector, our JVC home theater guide explains D-ILA technology, throw distance, screen selection, HDR, installation, and room requirements in more detail.
For detailed equipment selection, read our guide to true 4K projectors.
5. Plan Screen Size, Height, and Sightlines
The largest screen that fits on the wall is not always the most comfortable choice. Screen size should be considered together with viewing distance, resolution, seating arrangement, room width, and personal preference.
Visualize the proposed size
Use removable painter’s tape to mark the screen dimensions on the wall. Sit in the planned viewing positions and check whether the image area feels immersive without requiring excessive head or eye movement.
If possible, test several image sizes with the projector before ordering a fixed screen.
Coordinate the screen and front speakers
Leave room for the front-left, center, and front-right speakers. A screen that occupies the entire wall may force speakers into unsuitable positions.
An acoustically transparent screen can allow speakers to be placed behind the image, but it requires compatible material, correct distances, and sufficient room depth.
Check every row
The front row should not be uncomfortably close, while the rear row must not be so distant that the screen feels undersized.
Every seat should have a clear view. If a viewer’s head blocks the row behind, the rear seating position, screen height, or platform design must be adjusted.
6. Reserve Space for the Audio System
The interior should accommodate the correct speaker positions rather than forcing every speaker onto the nearest empty shelf.
Front soundstage
Leave suitable locations for the left, center, and right speakers. The center speaker should remain close to the screen so dialogue appears connected to the image.
A cabinet should not block speaker drivers or place the center channel deep inside a reflective compartment.
Surround speakers
Surround placement depends on the selected audio configuration. Doors, wall treatments, cabinets, and seating should not occupy every usable position. Where running speaker cables across a finished room is difficult, our guide to wireless speakers explains their installation advantages, placement flexibility, home theater uses, and important limitations.
Height channels
If ceiling or height speakers may be added, plan their positions before installing decorative ceilings, lighting fixtures, or acoustic panels.
Subwoofers
Do not create only one possible subwoofer location. Bass response changes throughout a room, so it is useful to preserve more than one practical placement option.
Soundbar systems
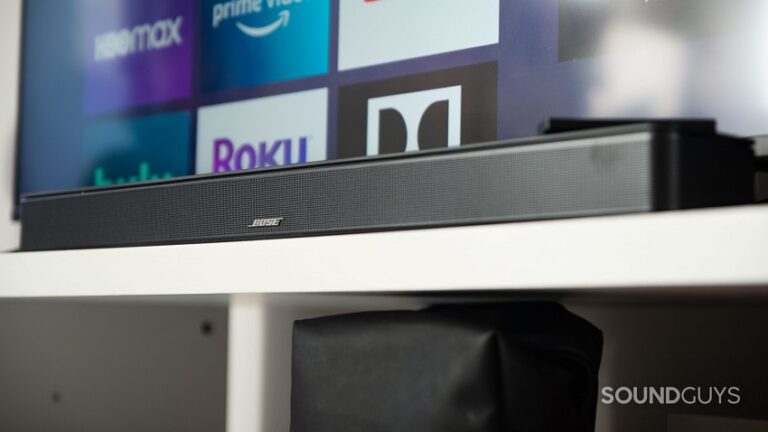
A soundbar may be suitable for a multipurpose room or a project where separate speakers cannot be installed. It still needs appropriate width, clearance, and a position that does not block the screen.
For component selection, connection, speaker configurations, and calibration, see our complete home theater setup guide.
7. Plan Room Acoustics and Sound Isolation
Acoustic treatment and sound isolation are different parts of home theater design.
Acoustic treatment
Acoustic treatment changes how sound behaves inside the room. It can help manage reflections, reverberation, bass response, and dialogue clarity.
Possible treatment elements include:
- Broadband absorption panels
- Bass traps
- Diffusion where appropriate
- Acoustically useful curtains
- Rugs or carpet
- Upholstered seating
- Purpose-designed ceiling treatment
Adding thin foam randomly to every wall does not guarantee balanced sound. The type, thickness, position, and amount of treatment should relate to the room’s actual acoustic behavior.
Over-treating only the highest frequencies can make a room sound dull while leaving bass problems unchanged.
Sound isolation
Sound isolation reduces noise transmission between the theater and surrounding spaces. It normally involves building construction rather than decorative acoustic panels.
A sound-isolation plan may address:
- Gaps around doors
- Wall and ceiling construction
- Floor and structural vibration
- Doors and glazing
- Electrical penetrations
- Ventilation paths
- Connections to adjacent structures
Sound can travel through small gaps and indirect structural paths. Consult an experienced acoustic or building professional when isolation is a major project requirement.
Do not confuse treatment with soundproofing
Acoustic panels can improve sound inside a room but usually do little to prevent deep bass from reaching nearby rooms. Effective isolation generally requires coordinated construction.
8. Design Home Theater Lighting
A theater should become dark enough for viewing while still providing safe light for entering, leaving, finding controls, and moving between rows.
Useful lighting layers include:
- Dimmable ceiling lighting
- Wall sconces
- Low-level pathway lighting
- Step and riser lighting
- Indirect LED accent lighting
- Bias lighting behind a television
- Decorative ceiling lighting
Avoid screen reflections
Do not place bright fixtures where they are directly visible in the screen or reflected from glossy surfaces.
Lights near a projector screen should be independently controllable so that the front of the room can become darker than the seating area when necessary.
Use separate lighting zones
Dividing lights into zones allows the room to support different activities. Cleaning, entering the room, gaming, conversation, and movie viewing do not require the same illumination.
Keep physical controls available
Automation and applications can be convenient, but people should still be able to operate essential lights from clearly positioned switches or buttons.
A movie scene might dim the ceiling lights, switch off fixtures near the screen, and leave low-level pathway lighting active. Our smart home lighting guide explains bulbs, switches, sensors, scenes, and automation in more detail.
Use decorative light carefully
Strong RGB effects and bright fiber-optic ceilings can become distracting. Decorative lighting should support the interior without reducing picture contrast or drawing attention away from the screen.
9. Plan Seating and Circulation
Seating should be planned together with the screen and speakers. The number of chairs is less important than comfortable viewing and clear circulation.
Possible seating arrangements include:
- A single row of recliners
- A sofa or sectional
- A loveseat with individual chairs
- Two straight rows
- A curved cinema-style row
- Modular furniture for a multipurpose room
Measure fully reclined furniture
Use the complete reclined dimensions rather than measuring a chair only when upright. Footrests, moving backs, and wall-clearance requirements can significantly change the usable room depth.
Do not overfill the room
Too many chairs can block walkways, interfere with speaker positions, and create poor viewing angles for outside seats.
Plan multiple rows carefully
A rear row may require a raised platform to see over viewers in front. Platform height should be determined from actual seating and screen positions rather than a universal rule.
For dimensions, risers, upholstery, ergonomics, and buying considerations, read our home theater chairs guide.
10. Plan Wiring and Equipment Placement
Installing cables before the room is finished can reduce visible wiring and make future maintenance easier.
Plan routes for:
- HDMI cables
- Speaker wire
- Subwoofer connections
- Ethernet
- Projector power
- Lighting controls
- Powered seating
- Sensors and automation devices
Separate signal and power planning
Power and low-voltage cable routes should comply with local electrical and building requirements. In-wall and in-ceiling cables must be suitable for the installation.
Electrical work should be completed by a qualified professional where required.
Provide access
Do not permanently conceal connectors, power supplies, network equipment, or junction points that may need repair or replacement.
Conduit or accessible cable channels can make future upgrades easier, especially between a projector and equipment rack.
Label both ends
Label every cable before walls, ceilings, cabinets, or equipment racks are completed. Clear labels simplify troubleshooting and equipment replacement.
Choose the equipment location
An equipment rack can be placed in the theater, inside ventilated cabinetry, or in an adjacent space. Consider cable length, remote-control operation, fan noise, access, and cooling.
11. Provide Ventilation and Temperature Control
Projectors, AV receivers, amplifiers, computers, game consoles, people, and powered seating can all add heat to the room.
A small enclosed theater can become uncomfortable quickly if ventilation is treated as an afterthought.
Plan for:
- Fresh-air circulation
- Removal of warm air
- Clear equipment ventilation openings
- Quiet heating and cooling operation
- Access for cleaning filters and vents
- Temperature control during long viewing sessions
Do not position chairs, curtains, acoustic panels, or cabinets over ventilation openings.
Equipment should not be placed in tightly enclosed furniture unless the enclosure is designed to manage the generated heat.
12. Choose Colors and Interior Finishes
Home cinema room design should control distracting reflections while still creating an interior that feels comfortable.
Use low-reflectance finishes near the screen
The wall and ceiling surfaces closest to the screen generally benefit from darker, matte finishes. These reduce reflected light that can make the image appear less contrasty.
Possible colors include:
- Charcoal
- Deep gray
- Dark blue
- Muted brown
- Deep green
- Other low-reflectance colors
The entire room does not need to be black. Side and rear areas can use warmer or more decorative colors, particularly in a multipurpose space.
Avoid glossy surfaces
Glossy paint, glass cabinets, polished metal, and reflective decorations can catch light from the screen and fixtures.
Use matte or low-sheen finishes where reflections would be visible during viewing.
Integrate acoustic treatment
Acoustic panels can become part of the visual design when covered with appropriate acoustically transparent fabric. They may be arranged as wall sections, decorative panels, or concealed behind fabric systems.
Keep the front wall visually quiet
The screen wall should not compete for attention. Avoid overly bright patterns, illuminated equipment displays, and reflective decorations close to the image.
13. Small Home Theater Design Ideas
A small home theater design should prioritize clear sightlines, simple speaker placement, and enough circulation rather than trying to include every possible feature.
For a compact room:
- Use one comfortable seating row.
- Consider a large television instead of forcing a projector installation.
- Use a suitable 5.1 system or soundbar rather than too many speakers.
- Choose wall-mounted or compact speakers where appropriate.
- Avoid deep cabinetry around the screen.
- Use a shallow equipment rack or place equipment in an adjacent area.
- Choose dark matte finishes near the screen.
- Use dimmable lighting divided into simple zones.
- Preserve ventilation around people and equipment.
- Avoid oversized recliners that eliminate the walkway.
A compact room can provide an excellent experience when the screen, speakers, and seating are selected for the available space.
14. Plan the Home Theater Budget
Home theater costs vary according to construction, display type, audio equipment, seating, acoustic treatment, lighting, automation, and professional installation.
Instead of beginning with product prices, divide the project into priorities.
Essential design expenses
- Room preparation
- Electrical and network connections
- Display and mounting
- Audio system
- Comfortable seating
- Basic lighting control
- Ventilation
Potential upgrades
- Acoustic treatment
- Sound-isolation construction
- Additional surround or height channels
- Premium recliners
- Automated lighting and controls
- Custom cabinetry
- Decorative wall treatments
- Fiber-optic or themed ceilings
Plan in phases
Complete difficult infrastructure work first. Wiring, conduit, power, ventilation, platform construction, and acoustic preparation are harder to change after the room is decorated.
Speakers, electronics, furniture, and decorative elements can often be upgraded later when the room has been designed with expansion in mind.
15. Common Home Theater Design Mistakes
- Buying equipment before planning the room: layout and infrastructure should come first.
- Choosing an oversized screen: the largest possible image is not always comfortable.
- Mounting the display too high: screen height should support a natural viewing position.
- Leaving no space for front speakers: screen and audio placement must be coordinated.
- Positioning speakers around furniture: the seating and speaker layout should be planned together.
- Confusing acoustic treatment with soundproofing: they solve different problems.
- Using bright or glossy finishes near the screen: reflections can reduce perceived image quality.
- Overfilling the room with chairs: preserve walkways and comfortable viewing angles.
- Ignoring recline depth: fully extended seating may block rows or doors.
- Forgetting ventilation: equipment and viewers add heat to the room.
- Installing too few outlets or cable routes: plan for present and future devices.
- Hiding inaccessible connections: cables and power supplies may eventually need replacement.
- Making controls too complicated: basic functions should remain easy for everyone.
- Spending the entire budget on equipment: layout, installation, seating, and room treatment also affect the result.
Frequently Asked Questions
What is the best room for a home theater?
A suitable room offers enough space for the desired screen and seating, manageable light, usable speaker positions, adequate ventilation, and some separation from quiet parts of the home.
Does a home theater need a dedicated room?
No. A living room, bedroom, basement, or other multipurpose space can provide an effective home theater when the display, audio, lighting, and furniture suit the room.
Is a projector better than a television?
A projector is attractive when very large image size is the priority. A television normally provides greater brightness and simpler everyday operation. Room light, desired image size, installation options, and budget should guide the decision.
What is the best home theater layout?
There is no universal layout. The best arrangement provides comfortable sightlines, suitable speaker positions, safe circulation, equipment ventilation, and convenient access for the expected number of viewers.
Does a home theater need acoustic treatment?
Not every room needs extensive treatment, but controlling excessive reflections can improve dialogue clarity and overall sound. Treatment should address the room’s actual behavior rather than being added randomly.
Does acoustic foam soundproof a room?
No. Thin acoustic foam may reduce some reflections inside the room, but effective sound isolation normally requires coordinated treatment of walls, ceilings, floors, doors, gaps, and ventilation paths.
What colors are best for a home theater?
Dark matte or low-reflectance finishes are generally useful near the screen. Side and rear walls can use a wider range of colors as long as reflections remain controlled.
How many seats should a home theater have?
Use only as many seats as the room can accommodate while maintaining comfortable viewing, clear walkways, suitable speaker placement, and enough space for fully reclined furniture.
Can smart lighting be used in a home theater?
Yes. Smart switches, dimmers, scenes, and sensors can simplify operation. Essential lights should also remain available through clear physical controls.
Should wiring be installed before acoustic treatment?
Wiring, outlets, speaker positions, equipment locations, and ventilation should be planned before the finished treatment is installed. Coordinate the complete wall and ceiling design so that later work does not damage cables or acoustic materials.
Final Home Theater Design Checklist
- Define how the room will be used.
- Measure the room and all fixed obstacles.
- Select the main screen and seating positions.
- Test screen size and sightlines.
- Reserve appropriate speaker and subwoofer locations.
- Preserve walkways and full recline clearance.
- Plan acoustic treatment and sound isolation separately.
- Divide lighting into practical zones.
- Install suitable power, signal, and network routes.
- Provide access for maintenance and upgrades.
- Plan ventilation for equipment and viewers.
- Use matte, low-reflectance finishes near the screen.
- Complete difficult infrastructure work before decorating.
- Keep basic controls simple and accessible.
The best home theater design begins with the room rather than the equipment list. When screen position, seating, speakers, lighting, acoustics, wiring, and ventilation are planned together, even a modest room can provide a comfortable and convincing viewing experience.