Home Theater Rack: Planning, Ventilation and Cable Management
A suitable rack also provides ventilation, cable access, and physical support.
Choosing one requires more than counting the number of devices. Component depth, weight, airflow direction, connectors, and future expansion all affect the decision.
This guide explains how to plan an AV equipment rack. It covers rack units, shelves, ventilation, power, cable management, placement, and common installation mistakes.
What Is a Home Theater Rack?
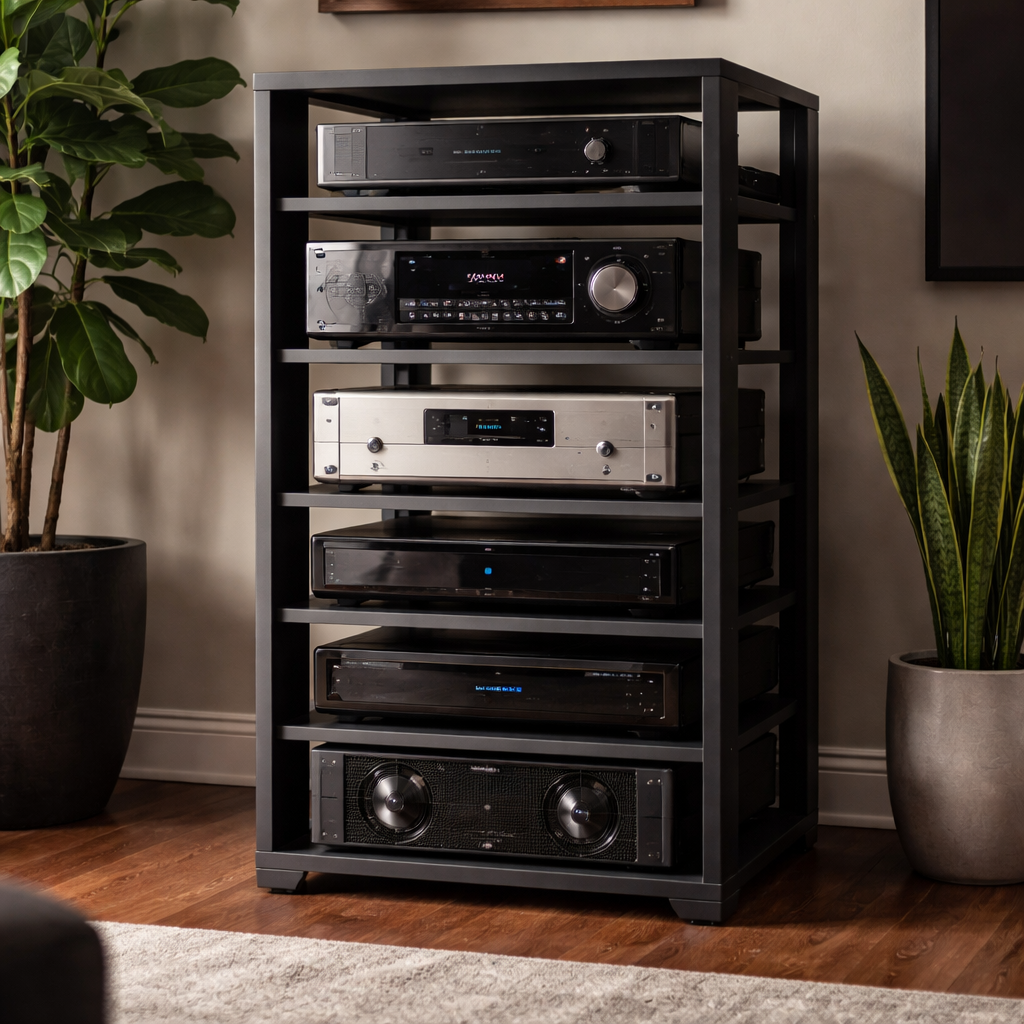
A home theater rack is a frame or cabinet for audio, video, network, and control equipment. It can be open, enclosed, freestanding, wall-mounted, or built into furniture.
Typical rack components include:
- An AV receiver
- Power amplifiers
- Streaming devices
- Disc players
- Game consoles
- A home theater computer
- Network switches
- Smart-home controllers
- Power distribution equipment
Some products attach directly to rack rails. Other devices need a ventilated shelf.
A rack is different from an ordinary closed cabinet. It should support equipment access, cable routing, ventilation, and safe weight distribution.
Do You Need a Home Theater Rack?
A rack is useful when the system contains several separate components. It can make installation and maintenance easier.
Possible benefits include:
- Clear equipment organization
- Improved access to connections
- Structured cable routing
- More predictable ventilation
- Space for future equipment
- Protection from accidental movement
A small system may not need a professional rack. A ventilated media cabinet can be sufficient for a receiver and one player.
A rack becomes more valuable as the system grows. It is especially useful when equipment is installed outside the viewing room.
For planning the complete room, see our
home theater design guide.
Types of Home Theater Racks
Open-Frame Rack
An open rack provides easy access and natural airflow. It works well in a dedicated equipment room.
The equipment remains visible and less protected from dust or accidental contact. Fan noise may also be easier to hear.
Enclosed Rack
An enclosed rack uses side panels and doors. It provides a cleaner appearance and greater equipment protection.
A closed enclosure needs a planned airflow path. Warm air must be able to leave the rack.
In-Cabinet Rack
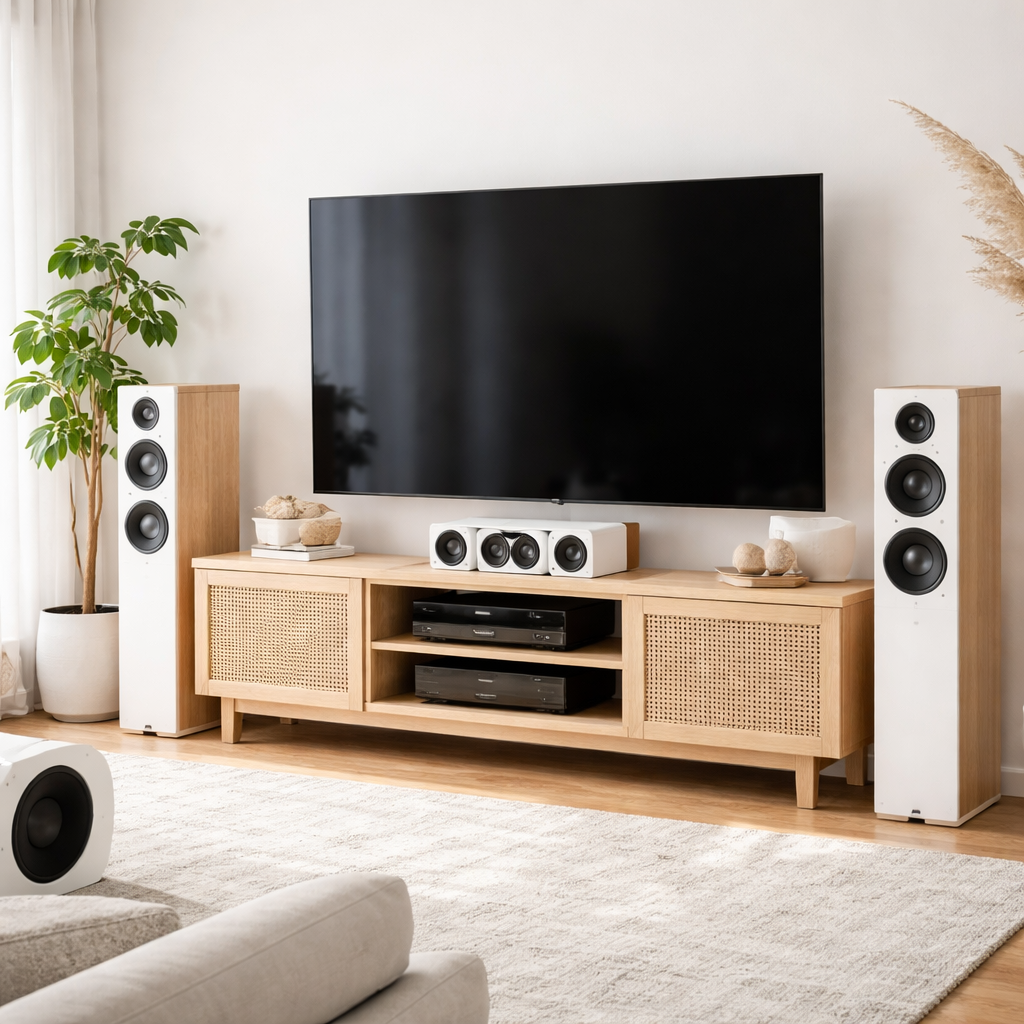
A compact rack frame can fit inside suitable furniture. It organizes components while preserving the room’s appearance.
The surrounding cabinet must provide enough depth and ventilation. Rear access should remain practical.
Slide-Out or Rotating Rack
A slide-out rack improves access to rear connections. Some models can also rotate after being pulled forward.
The installation needs space for movement and cables. The supporting cabinet must handle the full extended load.
Wall-Mounted Rack
A wall rack saves floor space and suits lightweight equipment. It can work well for network and control devices.
Wall construction, mounting hardware, rack depth, and weight capacity must all be verified.
Do not place a heavy AV receiver in a shallow wall rack unless the entire installation is rated for it.
Freestanding Floor Rack
A floor rack can support larger systems and deeper components. It may include casters, leveling feet, doors, and removable panels.
Tall racks should be stabilized according to the manufacturer’s instructions. Heavy equipment should generally remain near the bottom.
Create a Home Theater Equipment List
List every component before choosing the rack. Include equipment that may be added later.
For each device, record:
- Width
- Height
- Depth
- Weight
- Ventilation openings
- Connector locations
- Power requirements
- Rack-mounting options
Measure the physical product when possible. Published dimensions may exclude cables, antennas, knobs, or feet.
Include Accessories
Small accessories also use space. Your plan may need room for:
- Rack shelves
- Cable-management bars
- Power distribution
- Cooling panels
- Network patch panels
- Blanking panels
- Storage drawers
Do not fill every available position during the first installation. Spare capacity makes future changes easier.
Understand Rack Units
Professional equipment height is commonly measured in rack units. One rack unit is written as 1U or 1RU.
One rack unit equals 1.75 inches, or 44.45 millimeters. A 2U component uses twice that rail height.
The rack’s advertised capacity shows its available vertical mounting space. It does not guarantee that every component will fit.
Many home theater devices are not designed for direct rack mounting. They require shelves that may consume additional rack units.
Calculate the Required Height
- Add the rack height of mounted equipment.
- Add space for non-rack components and shelves.
- Add cooling or blanking panels where required.
- Add cable and power accessories.
- Reserve room for future equipment.
Do not use excessive empty gaps as the only cooling strategy. Airflow should follow a planned path.
Check Rack Width and Depth
Rack units describe height, but depth is often the limiting measurement. Receivers and amplifiers can be particularly deep.
Account for:
- The component chassis
- Front knobs and doors
- Rear connectors
- HDMI cable bend radius
- Speaker terminals
- Power plugs
- Rear cable-management hardware
A device may physically fit while leaving no room for its cables. This can strain connectors and make servicing difficult.
Usable Depth Versus Overall Depth
Overall rack depth includes the exterior frame or doors. Usable mounting depth may be smaller.
Check both measurements. Adjustable mounting rails can provide additional flexibility.
Check the Rack Opening
Professional racks commonly use 19-inch mounting rails. The outer cabinet will be wider than the rail opening.
Ordinary furniture described as an “AV rack” may not follow rack-mount standards. Verify its internal dimensions.
Plan Rack Weight and Stability
Add the weight of every component, shelf, panel, and accessory. Keep the total below the rack’s rated capacity.
A shelf also has its own weight limit. The rack may support the total load while an individual shelf remains overloaded.
Place Heavy Equipment Low
Receivers, amplifiers, and battery backup equipment can be heavy. Installing them low improves stability.
Lightweight network and media devices can sit higher. This arrangement also reduces lifting risks during installation.
Use Suitable Shelves and Supports
A heavy component may need a four-point shelf or rear support. A shallow front-mounted shelf may bend under a deep load.
Follow the shelf and rack manufacturers’ load instructions.
Secure Tall or Mobile Racks
Casters improve access but can reduce stability. Lock them before operating or servicing equipment.
Use approved anti-tip or anchoring hardware when required. Never climb on a rack or use an open drawer as a step.
Arrange Components Inside the Rack
A good layout balances weight, heat, cable access, and daily operation.
A possible arrangement is:
- Light control and network devices near the top
- Frequently accessed players at a convenient height
- The AV receiver in a well-ventilated position
- Power amplifiers near the lower section
- Heavy power equipment at the bottom
This is only a starting point. Air intake and exhaust directions may require another arrangement.
Keep Displays and Controls Visible
Frequently used buttons should remain accessible. Displays may also need to be visible during troubleshooting.
If the rack has a door, confirm that remote signals can reach the equipment. A separate infrared repeater may be required.
Do Not Put a Conventional Subwoofer in the Rack
A subwoofer needs suitable room placement. Its vibration and enclosure size also make rack installation impractical.
Keep it in the listening room unless it was specifically designed for another installation method.
Home Theater Rack Ventilation
Receivers, amplifiers, computers, and game consoles produce heat. The rack must supply cooler air and release warmer air.
Start by checking each component’s manual. Follow its required clearance and operating-temperature guidance.
Identify Airflow Direction
Equipment may draw air from the front, bottom, sides, or rear. Do not block its intake or exhaust openings.
Airflow paths should work together. One component should not discharge hot air directly into another device’s intake.
Passive Ventilation
An open rack may provide enough natural airflow for a modest system. An enclosed cabinet needs lower intake and upper exhaust openings.
Warm air naturally rises, but passive movement may be insufficient for dense equipment.
Active Cooling
Fans may be useful when natural ventilation cannot remove enough heat. Thermostatic control can reduce noise when full airflow is unnecessary.
A fan should move air through the enclosure. Simply circulating hot air inside the rack provides little benefit.
Do Not Guess from Touch Alone
Some components normally feel warm. Surface temperature does not reveal every internal condition.
A rack temperature sensor can help monitor an enclosed installation. Investigate repeated shutdowns or protection warnings immediately.
Keep Ventilation Openings Clean
Dust can restrict airflow. Inspect vents, filters, and fans periodically.
Turn off and unplug equipment before cleaning where the manufacturer requires it.
Organize Rack Power Safely
A rack often concentrates several electrical devices in one location. Power planning should be completed before installation.
Consider:
- Total connected load
- Available circuit capacity
- Outlet locations
- Surge protection
- Power distribution
- Backup needs
- Local electrical requirements
Power Distribution Unit
A suitable power distribution unit can organize outlets inside the rack. It must be rated for the circuit and connected equipment.
Do not join several power strips together. Avoid overloading a wall outlet or extension cable.
Surge Protection
Surge protection may help protect connected electronics. Its specifications and replacement indicators should be easy to inspect.
A surge protector is not the same as a battery backup.
Uninterruptible Power Supply
A UPS can support network devices, controllers, and storage during brief interruptions. It may also allow safe shutdown.
Large amplifiers can have substantial power demands. Do not connect them to a small UPS without confirming compatibility and capacity.
Use Qualified Electrical Help
Permanent outlets and dedicated circuits may require a licensed electrician. Follow local electrical rules.
Never modify grounding connections to solve noise problems.
Home Theater Rack Cable Management
Cable management should support servicing, airflow, and reliable connections. The goal is not merely a tidy photograph.
Label Both Ends
Label every cable at both ends. Include the source and destination.
Examples include:
- TV eARC to receiver output
- Console to HDMI input 3
- Receiver to center speaker
- Network switch to streaming player
Clear labels reduce mistakes during replacement or troubleshooting.
Separate Cable Types
Route power and signal cables separately where practical. Cross them at an angle when they must meet.
Do not stretch cables tightly. Leave enough slack for safe connection and service access.
Use Reusable Fasteners
Hook-and-loop straps are easier to reopen than permanent plastic ties. Do not tighten them enough to deform a cable.
Support heavy cable bundles. Their weight should not hang from HDMI or network connectors.
Respect Cable Bend Limits
Avoid sharp bends in HDMI, optical, and network cables. Fiber-based cables may have specific bend requirements.
Follow the cable manufacturer’s instructions.
Create a Connection Record
Keep a simple diagram or spreadsheet of every connection. Update it whenever the system changes.
Photograph the rear of the rack after installation. This can help when physical access is limited.
Remote Control and Network Access
Equipment behind a solid door may not receive infrared commands. Glass does not always guarantee reliable control.
Possible solutions include:
- An infrared repeater
- Network-based device control
- Radio-frequency control
- A compatible control hub
- An external remote receiver
Test control reliability before completing permanent furniture work.
Network Connections
A wired network can serve streamers, receivers, computers, and control systems. Place the network switch where its ports remain accessible.
Do not block wireless antennas with metal panels. Equipment location can affect Wi-Fi and Bluetooth reception.
A
home theater computer
may need additional space for ventilation, storage, and peripheral connections.
Choose the Home Theater Rack Location
Inside the Viewing Room
This position keeps controls and disc players nearby. It also makes component noise and indicator lights more noticeable.
Avoid placing bright displays close to the screen. Reflections can distract during dark scenes.
Behind the Seating Area
A rear rack can remain accessible without competing with the screen. Cooling noise may be more noticeable near the seats.
Separate Equipment Room
A separate room can remove fan noise and visual clutter. It requires longer signal and speaker cable runs.
Remote control, ventilation, and service access must be planned carefully.
Inside Furniture
Furniture can hide equipment in a living room. It must still provide adequate depth and airflow.
Do not push a receiver into a sealed compartment. Decorative doors should not block air movement.
Home Theater Rack Materials
Steel
Steel racks offer strength and a wide range of mounting accessories. Their weight and industrial appearance may not suit every room.
Aluminum
Aluminum can reduce rack weight. Strength and load capacity depend on the specific construction.
Wood
Wood furniture can blend with residential interiors. Its panels require suitable ventilation openings.
A wood cabinet may contain an internal metal rack frame. This combines rack mounting with a furniture-style exterior.
Engineered Wood and Laminates
These materials can provide an affordable finished appearance. Check shelf load ratings and resistance to heat.
Glass Doors
Glass can protect equipment while keeping displays visible. It can also restrict airflow when the enclosure lacks vents.
Tinted or reflective glass may interfere with some infrared remotes. Test the control system first.
Common Home Theater Rack Mistakes
Choosing a Rack That Is Too Shallow
Component depth is only part of the required space. Rear connectors and cable bends need additional clearance.
Filling Every Rack Unit
A completely full rack leaves little flexibility. It can also complicate ventilation and cable changes.
Ignoring Equipment Weight
A shelf may fail even when the rack supports the total load. Check every individual rating.
Placing Heavy Equipment at the Top
A top-heavy rack is less stable. Install heavy components near the bottom.
Blocking Airflow
A closed door or solid rear panel can trap heat. Follow the airflow path through the entire enclosure.
Adding Fans Without an Air Path
Fans need an intake and an exhaust. Moving hot air around a closed cabinet does not cool the equipment effectively.
Making Cables Too Short
Very short cables can strain connectors. They may also prevent a slide-out rack from moving safely.
Failing to Label Connections
Unlabeled wiring makes every future change slower. Label cables during installation, not afterward.
Using Incompatible Rack Screws
Rack rails use different threading or cage-nut systems. Use hardware specified for the rack.
Ignoring Rear Access
A rack against a wall may become difficult to service. Plan removable panels, casters, or another access method.
Home Theater Rack Planning Checklist
- List every current component.
- Include possible future equipment.
- Record component height, depth, and weight.
- Calculate the required rack units.
- Check usable rack depth.
- Add room for connectors and cable bends.
- Verify rack and shelf load ratings.
- Place heavy equipment near the bottom.
- Identify every intake and exhaust opening.
- Plan a complete ventilation path.
- Provide safe power distribution.
- Separate and label cables.
- Confirm remote-control operation.
- Allow practical rear service access.
- Follow rack and equipment manuals.
For help connecting the receiver and other components, read our
home theater amplifier and receiver guide.
Frequently Asked Questions
What size home theater rack do I need?
Add the space required by every component and shelf. Then include ventilation, cable-management, and future expansion capacity.
What does 1U mean in an AV rack?
One rack unit equals 1.75 inches, or 44.45 millimeters, of vertical rail space.
Will every AV receiver fit a standard rack?
No. Many receivers need a shelf and significant depth. Check the chassis, connections, ventilation clearance, and shelf rating.
Does a home theater rack need fans?
Not always. An open rack may cool through natural airflow. Enclosed or densely loaded racks may need active ventilation.
Where should an AV receiver go in the rack?
Place it on a suitable shelf with the required ventilation clearance. Avoid positioning it directly below another heat-producing component.
Can I put a game console inside a closed rack?
Only when the enclosure provides suitable airflow and wireless reception. Follow the console manufacturer’s clearance requirements.
Should a home theater rack have a glass door?
A glass door can improve appearance and protection. It must not prevent ventilation or reliable remote control.
Can a rack be installed inside a closet?
Yes, but the closet needs ventilation and service access. Cooling only the rack is insufficient if hot air remains trapped in the closet.
Should I put a UPS in the rack?
A correctly sized UPS can support network, control, and storage equipment. High-power amplifiers need special consideration.
Can I install an AV rack myself?
A small freestanding rack may be manageable. Wall mounting, permanent wiring, and new electrical work may require qualified professionals.
Final Thoughts
A home theater rack should support the equipment physically and thermally. It should also simplify future maintenance.
Begin with a complete equipment list. Check depth, weight, connections, and airflow before choosing the rack.
Install heavy components near the bottom. Provide a clear cooling path and safe power distribution.
Finally, label every connection and preserve rear access. A rack that is easy to service will remain useful as the theater changes.