How to Properly Install a Mobile Phone Signal Booster
Contents
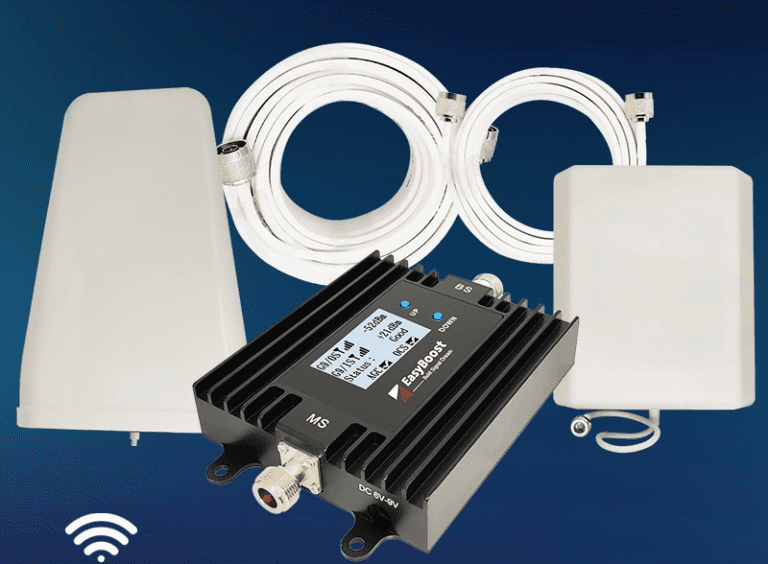
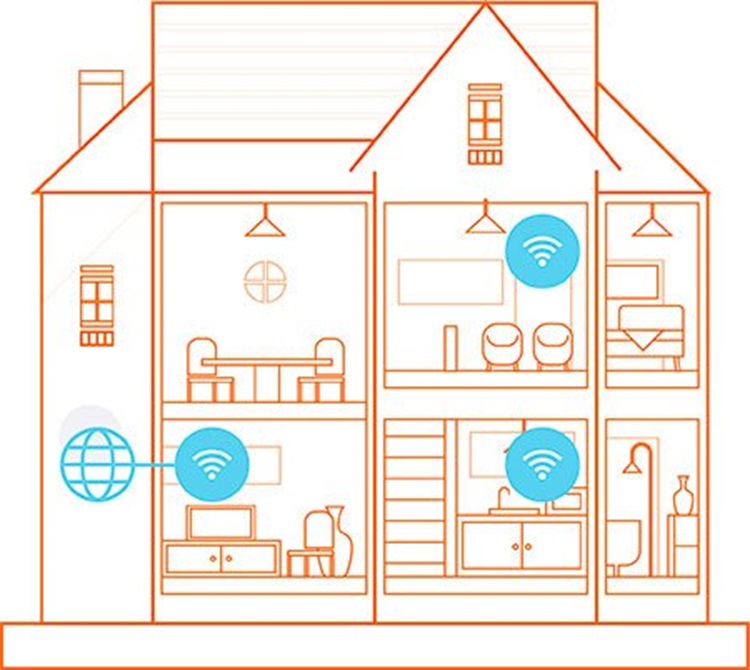
What a Mobile Signal Booster Does
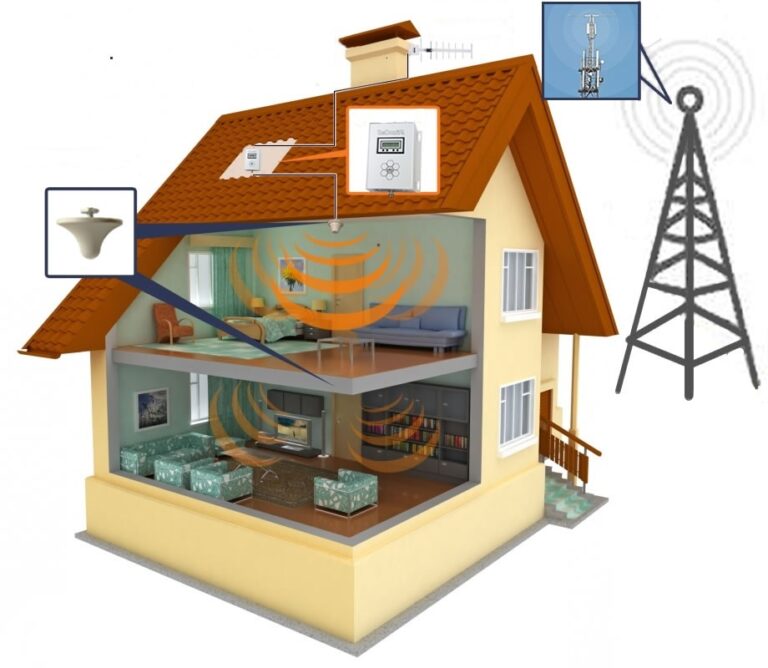
A mobile phone signal booster (also known as a repeater) improves weak cellular reception by capturing an existing outdoor signal,
amplifying it, and redistributing it indoors. It typically consists of:
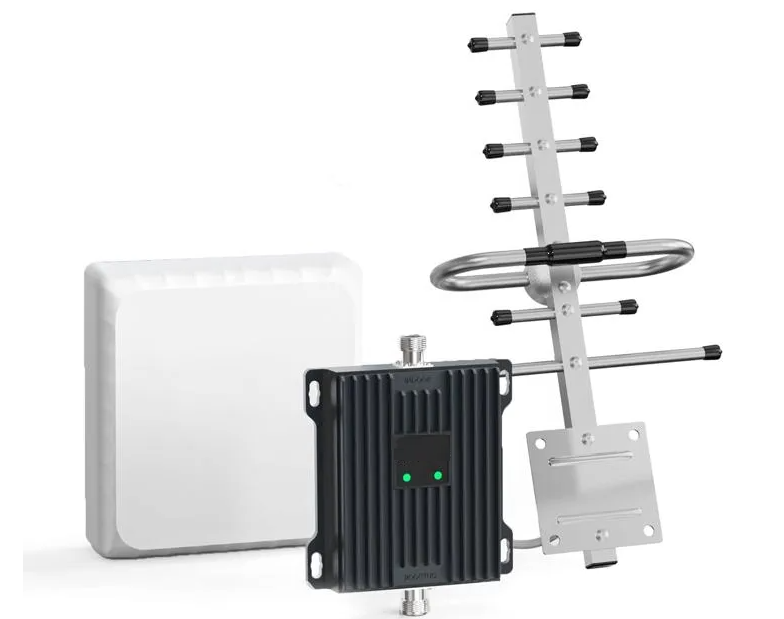
- Outdoor antenna – captures the signal from the nearest cell tower
- Amplifier (booster unit) – strengthens the signal
- Indoor antenna – broadcasts the improved signal inside your home or office
Boosters are especially useful in rural areas, large houses, metal-frame buildings, and locations with thick walls that block radio waves.
What You Need Before Installation
Before you begin, make sure you have:
- A stable outdoor signal (at least 1–2 bars)
- Access to the roof, balcony, or exterior wall
- A suitable mounting kit for the outdoor antenna
- A coaxial cable long enough to connect the outdoor antenna to the booster
- A power outlet near the booster unit
If you are unsure about the outdoor signal quality, you can use your phone’s field test mode or a mobile signal measurement app
to check signal strength more precisely.
Step-by-Step Installation Guide
Step 1: Find the Strongest Outdoor Signal
Walk around your property and check signal strength near:
- Roof edges
- Balconies
- Exterior walls
- Windows facing the nearest cell tower
Choose the spot with the most stable reception. This will be the mounting point for your outdoor antenna and will determine
how well the booster can perform.
Step 2: Mount the Outdoor Antenna
When mounting the outdoor antenna:
- Install the antenna as high as possible
- Point it toward the nearest cell tower
- Ensure it is firmly fixed and weather-protected
- Keep it away from large metal surfaces that may cause interference
Directional antennas require more precise alignment but can deliver stronger performance. Omnidirectional antennas are easier
to install but may provide slightly weaker gain in challenging environments.
Step 3: Connect the Booster Unit
Run the coaxial cable from the outdoor antenna to the booster unit inside the building. While doing this:
- Avoid sharp bends and excessive cable tension
- Keep the cable as short as practical to reduce signal loss
- Place the booster in a central indoor location if possible
- Ensure proper ventilation – boosters generate heat during operation
Step 4: Install the Indoor Antenna
For the indoor antenna:
- Mount it in the area where you need the strongest signal (office, living room, etc.)
- Keep at least 7–10 meters of separation between indoor and outdoor antennas
- Use a solid wall or floor between antennas to reduce feedback (oscillation)
- For large homes, consider multiple indoor antennas or a distribution system
Step 5: Power Up and Test
Once everything is connected:
- Plug in the booster and switch it on
- Check indicator lights for proper operation (no error or alarm lights)
- Walk around your home and test signal strength on your phone
- Fine-tune the outdoor antenna direction if the improvement is not consistent
If the signal does not improve, recheck all cable connections, antenna placement, and the distance between antennas.
Common Mistakes to Avoid
- Installing antennas too close together – this can cause oscillation and force the booster to shut down.
- Pointing the outdoor antenna in the wrong direction – even a small misalignment can reduce performance.
- Using excessively long cables – longer cables introduce more signal loss.
- Placing the booster in a closed cabinet – poor ventilation can lead to overheating and reduced lifespan.
- Expecting a booster to create signal where none exists – it can only amplify an existing signal.
Useful Resources
For deeper technical details and antenna selection, explore these guides: